Encrypting Email with a Riseup.net Account, Thunderbird and Enigmail

Riseup.net is a fantastic tech collective providing technical infrastructure (email, email lists, etherpads, etc.) for do-gooding radicals.
This guide will walk you through setting up a riseup account and configuring it to use encryption when communicating with people.
There are five steps -
- Create a riseup.net email account
- Set up the email client Thunderbird
- Install GnuPG
- Install Enigmail
- Swap Keys with Your Friends!
1. Create a Riseup.net Email Account
This part is easy. Go ahead and request an account.
Next, donate to riseup! Instead of spying on you and selling that data to advertisers, they run off of donations from us, the user.
I suggest $5-15/month if you can. Think about how much you rely on email. If you use it on a daily basis, a $5 a month donation is well worth the value it brings to you. Just sayin. :)
2. Set Up Thunderbird
Thunderbird is a free and open-source email client. It allows you to check your email through an application on your computer instead of logging into your email account at mail.riseup.net
You will then be walked through configuring Thunderbird with your riseup email account.
3. Install GnuPG
Go to the GnuPG download page.
Scroll down to the GnuPG Binary Releases section.
Choose the download link for your operating system.
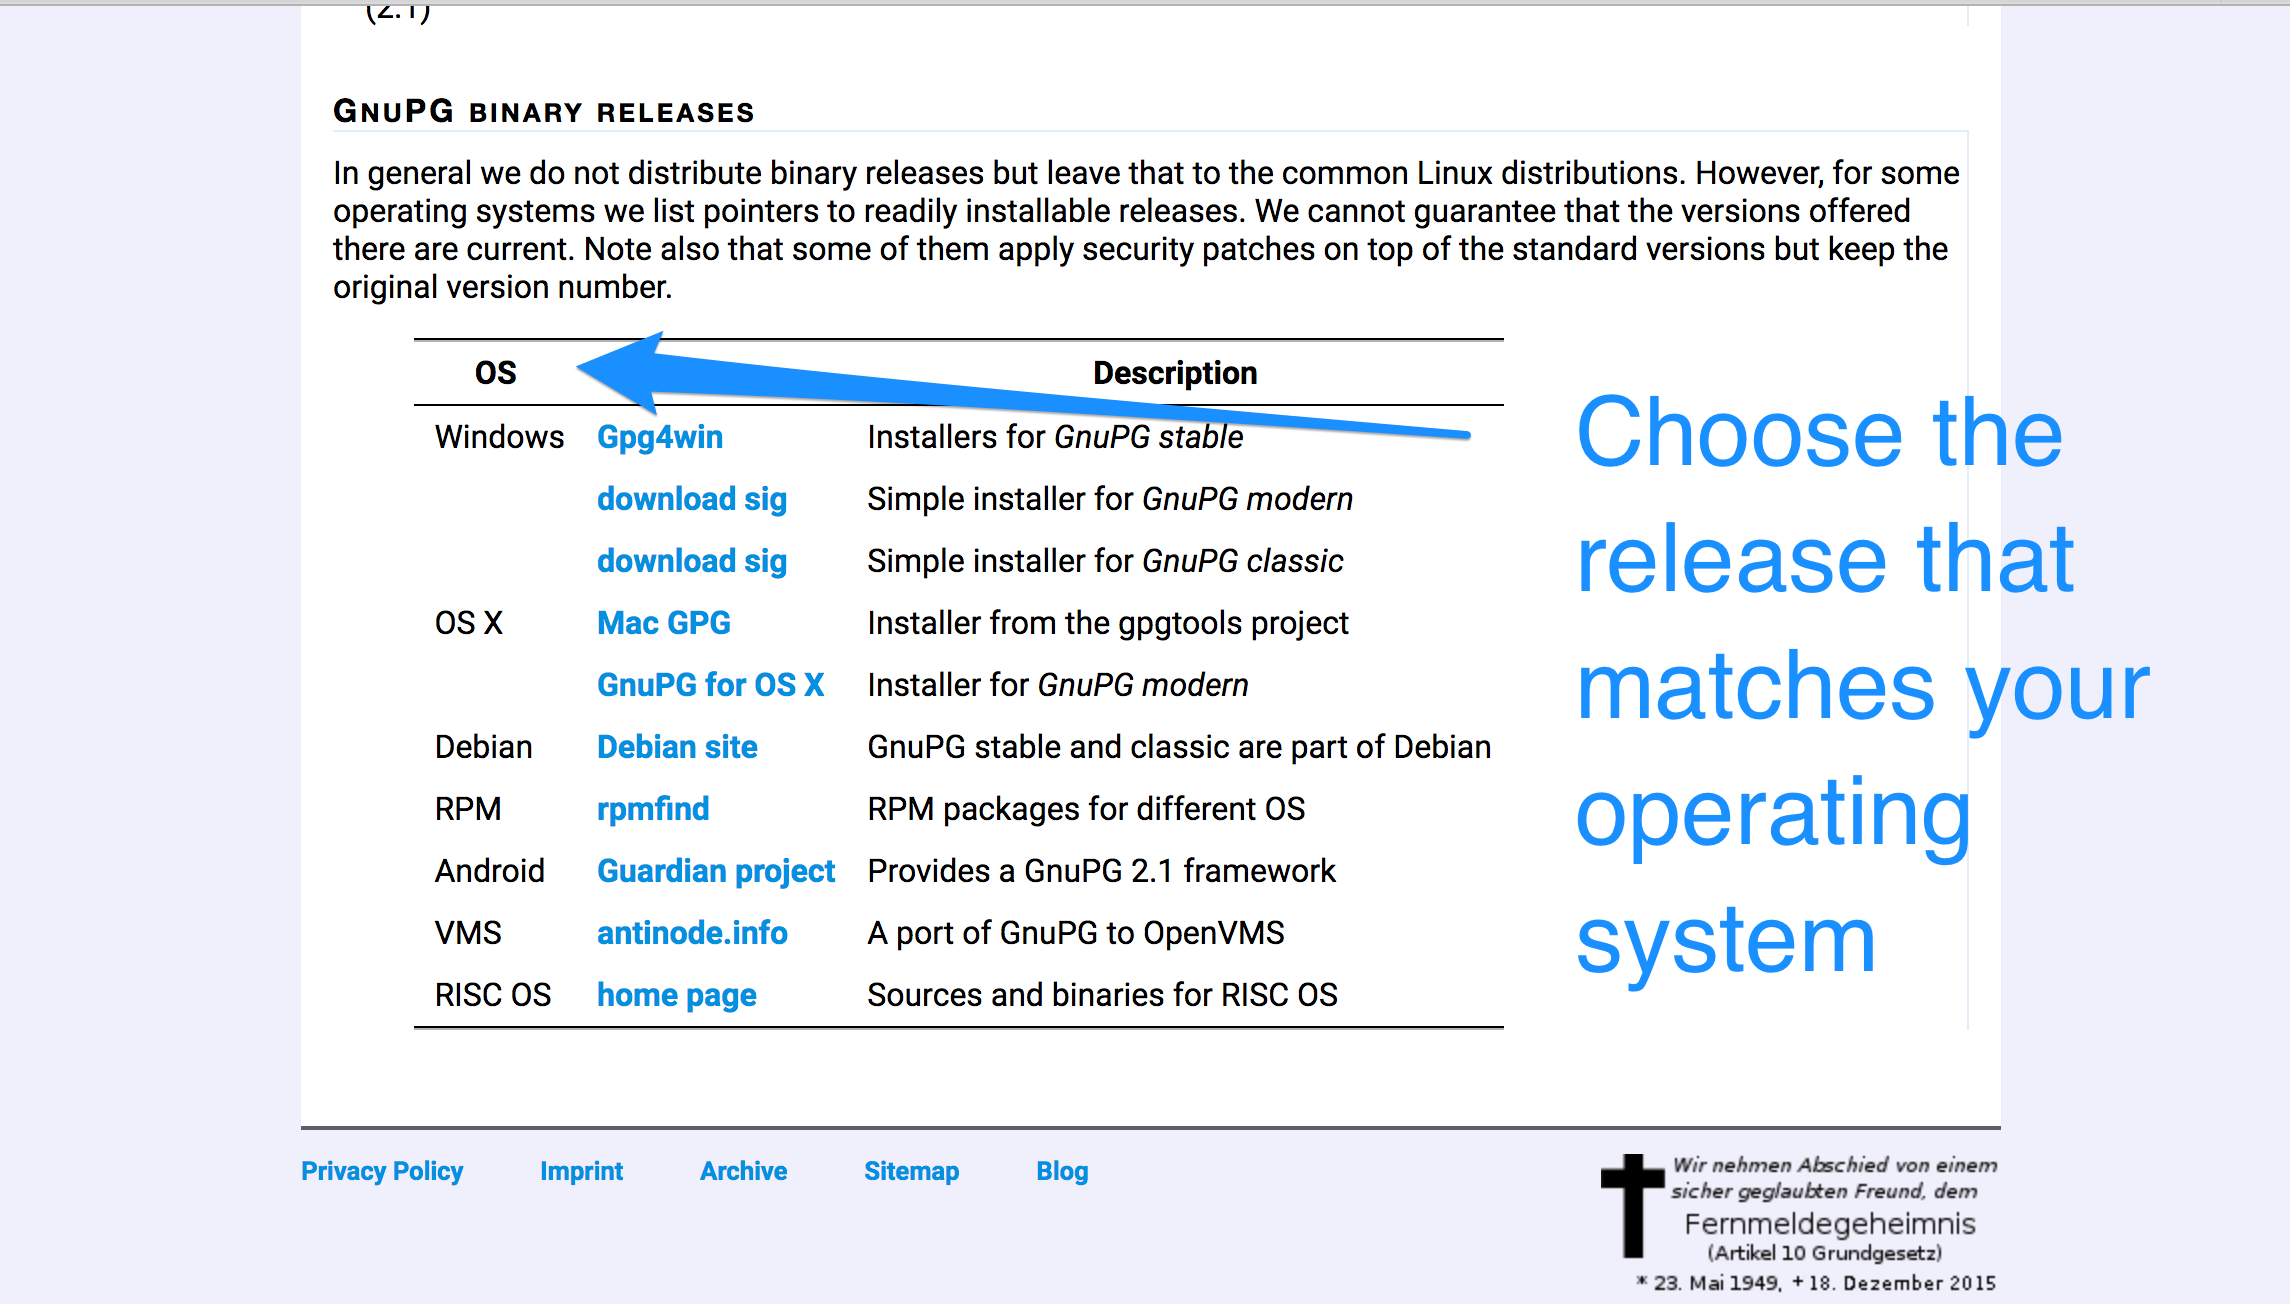
This will take you to another page to download the file. In my case it was on SourceForge. Don't worry, these download links are legit, no spy/adware to worry about.
Once the file is downloaded, open it up and follow the installation prompts that come up.
Congrats! You have GnuPG installed. On to the penultimate step.
Install Enigmail
Open up Thunderbird and navigate to Tools -> Add-ons.
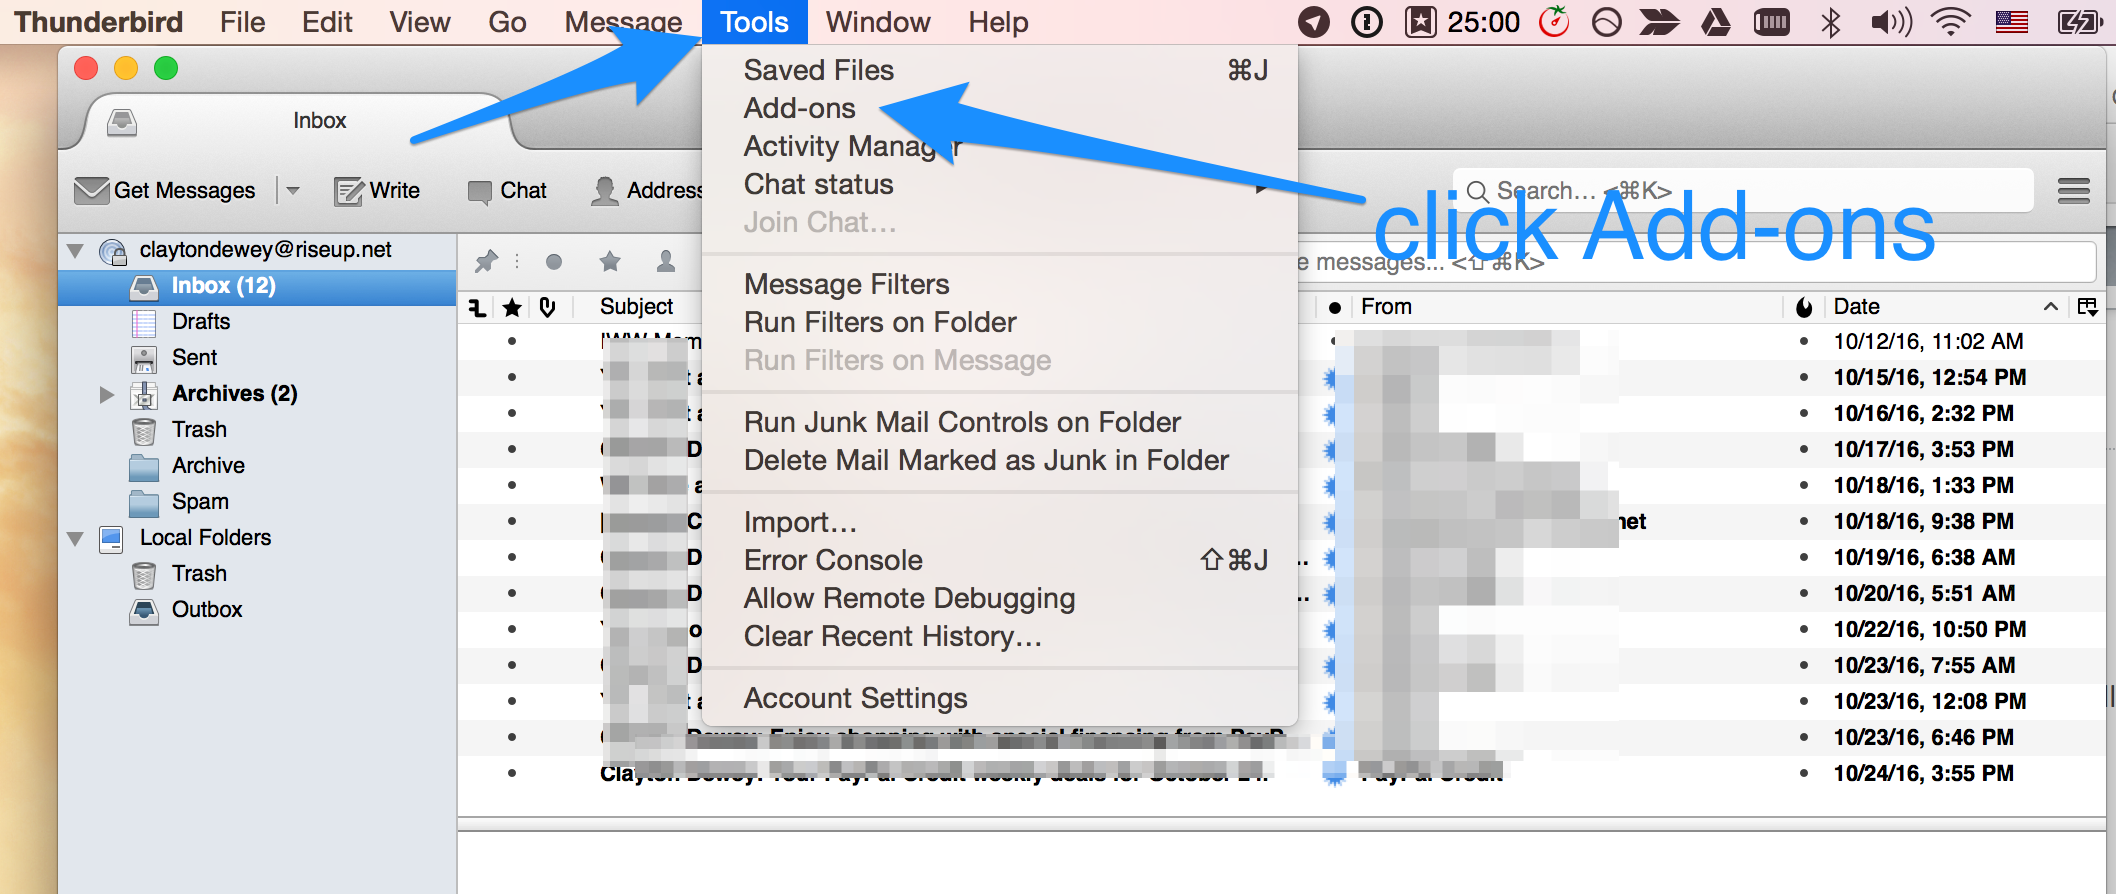
Now search for Enigmail.
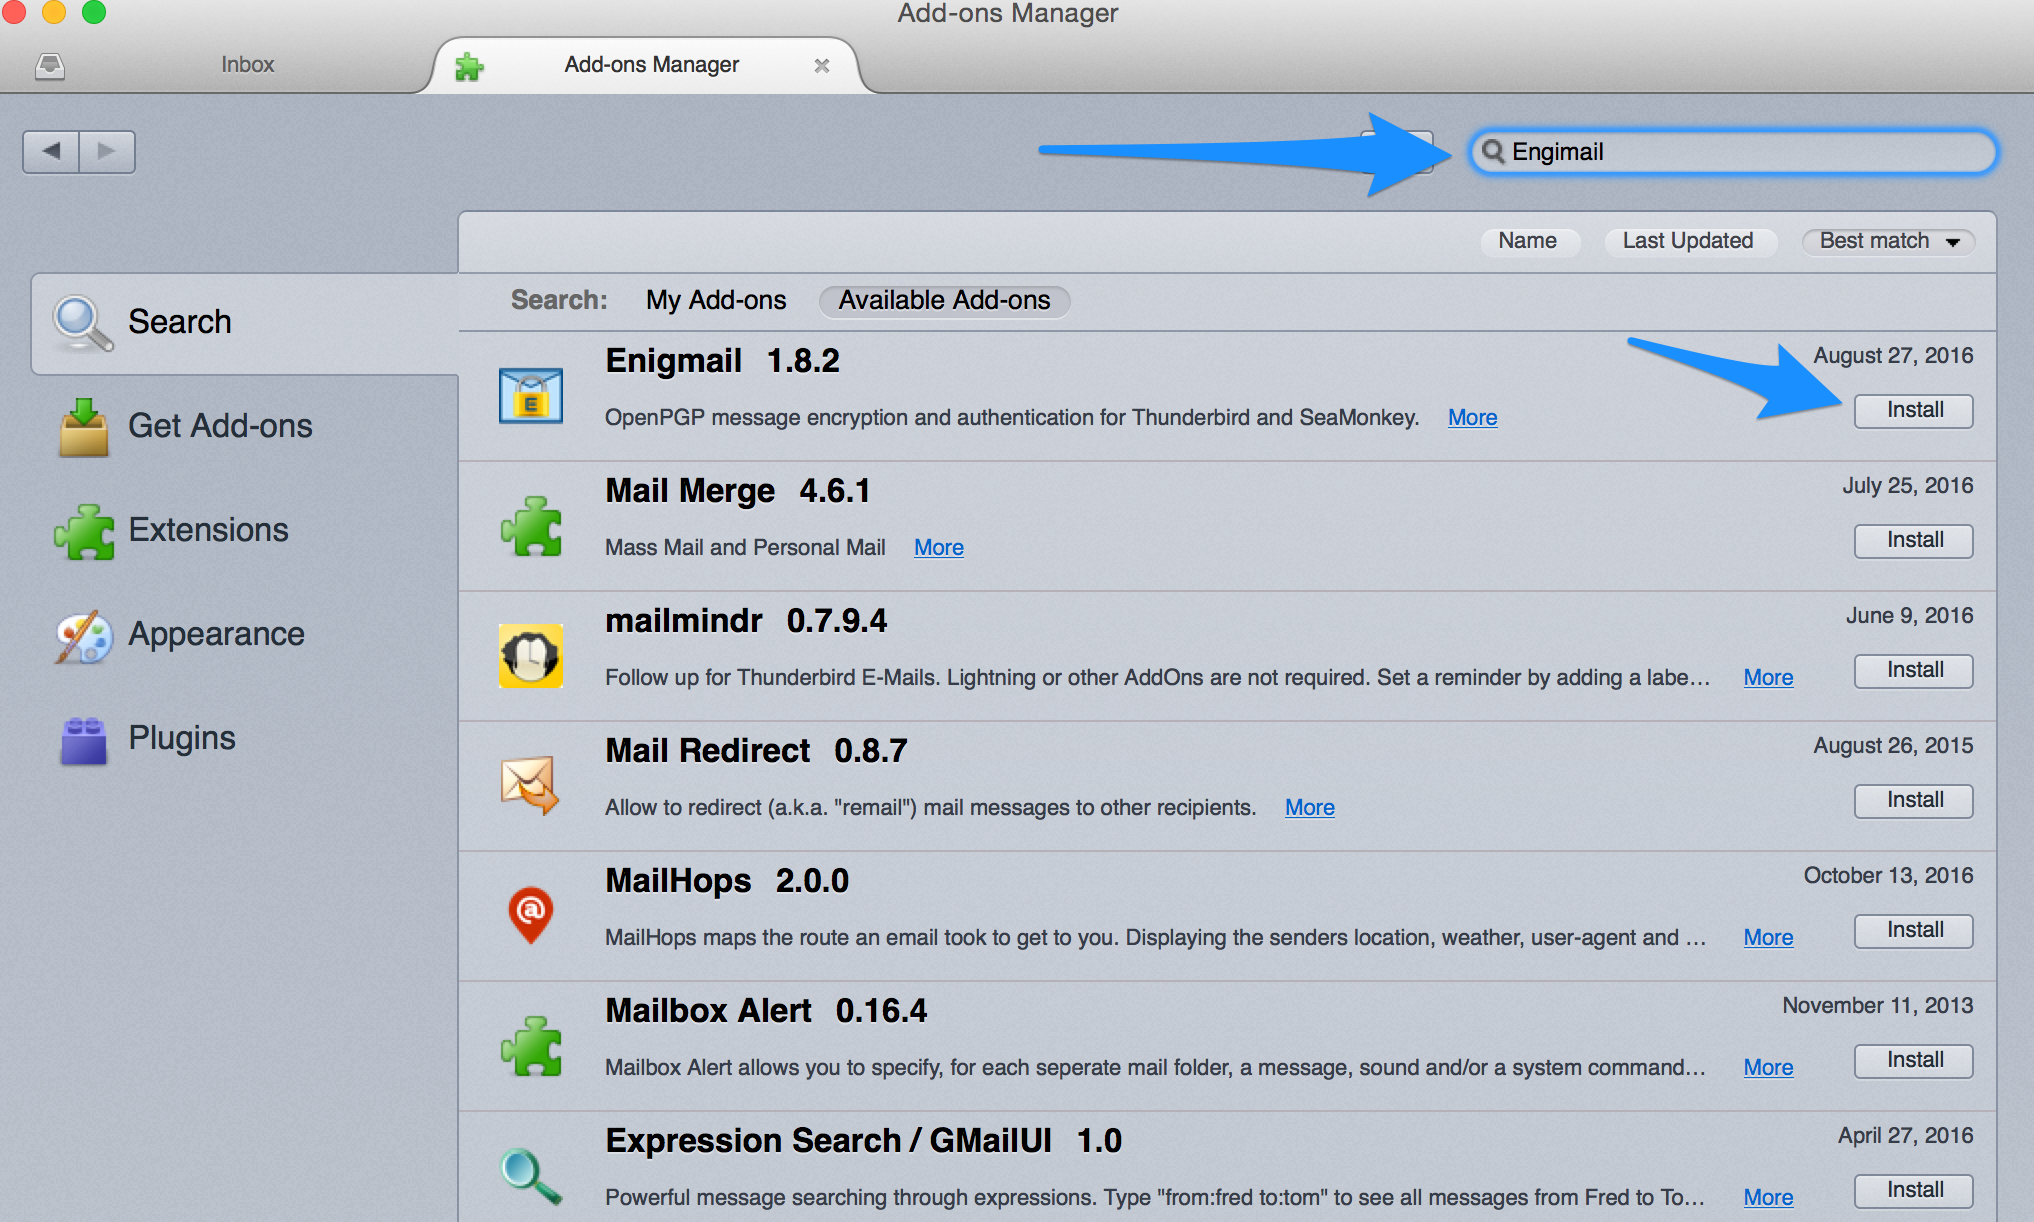
Go and install it.
You will then need to restart Thunderbird.
Once you reinstall Thunderbird an Enigmail install prompt will appear.
Follow the step by step directions and opt for the default/beginner approach each time.
When creating a key you will be asked to enter a passphrase. Pick something memorable, secure and not one you use anywhere else. This is the key that encrypts your emails after all. :)
Your key will then get generated. Woo!
When you create your Revocation Certificate, save it wherever you'd like. After saving it, it's best to move it to USB flash drive and then keep that flash drive in a safe place that won't get misplaced like in a file cabinet.
You're all set!
Swap Keys with Friends!
Now we're on to the fun part. Compose a message in Thunderbird. Towards the top of the window you'll see a link to "Attach My Public Key."
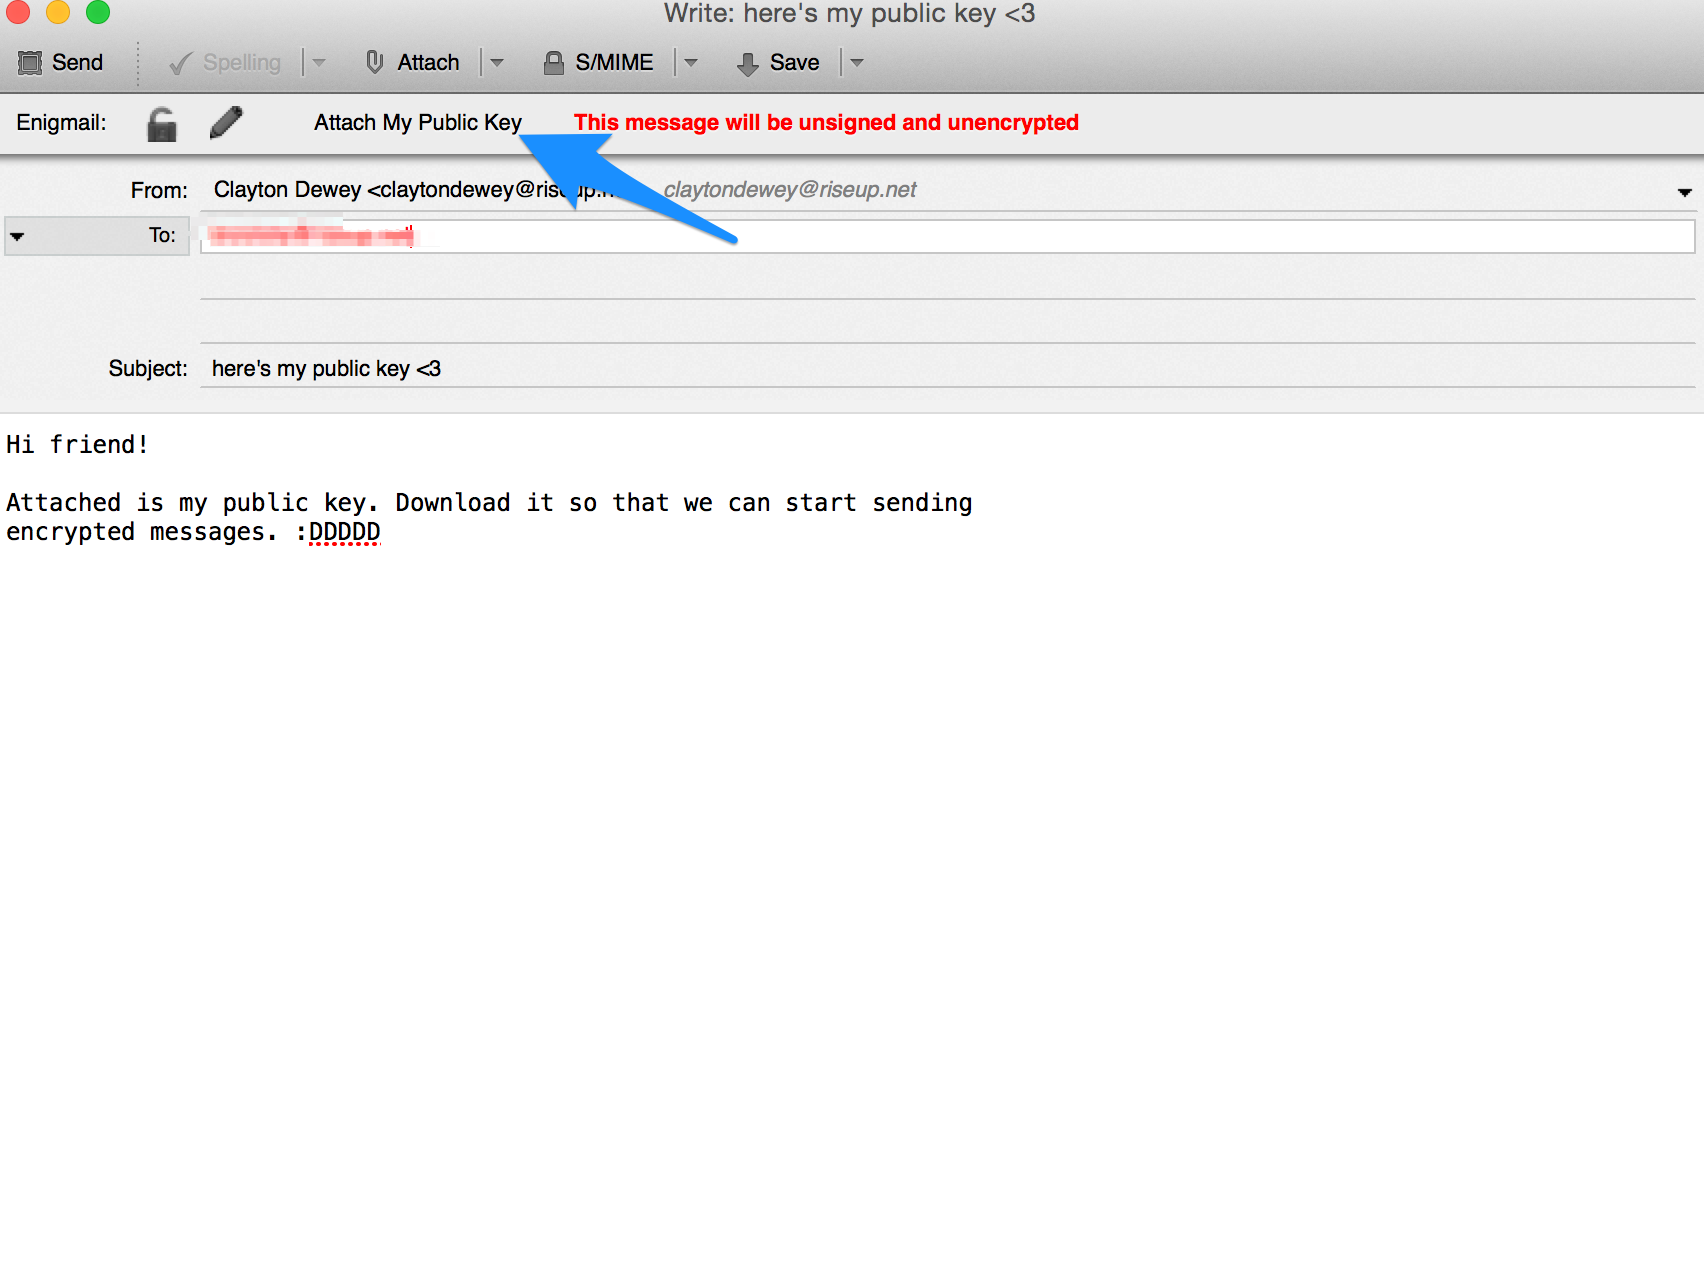
Note: Once you've clicked "Attach My Public Key" and hover away from the button, it should then appear "pressed in." It's subtle and weird and confused me there for a second as to whether it worked.

Then go ahead and send your email. Your friend now has your public key.
Now have them send you their key.
Download the attachment (it'll be a .asc file).
In Thunderbird, go to Engimail -> Key Management

Now go to File > Import Keys From File
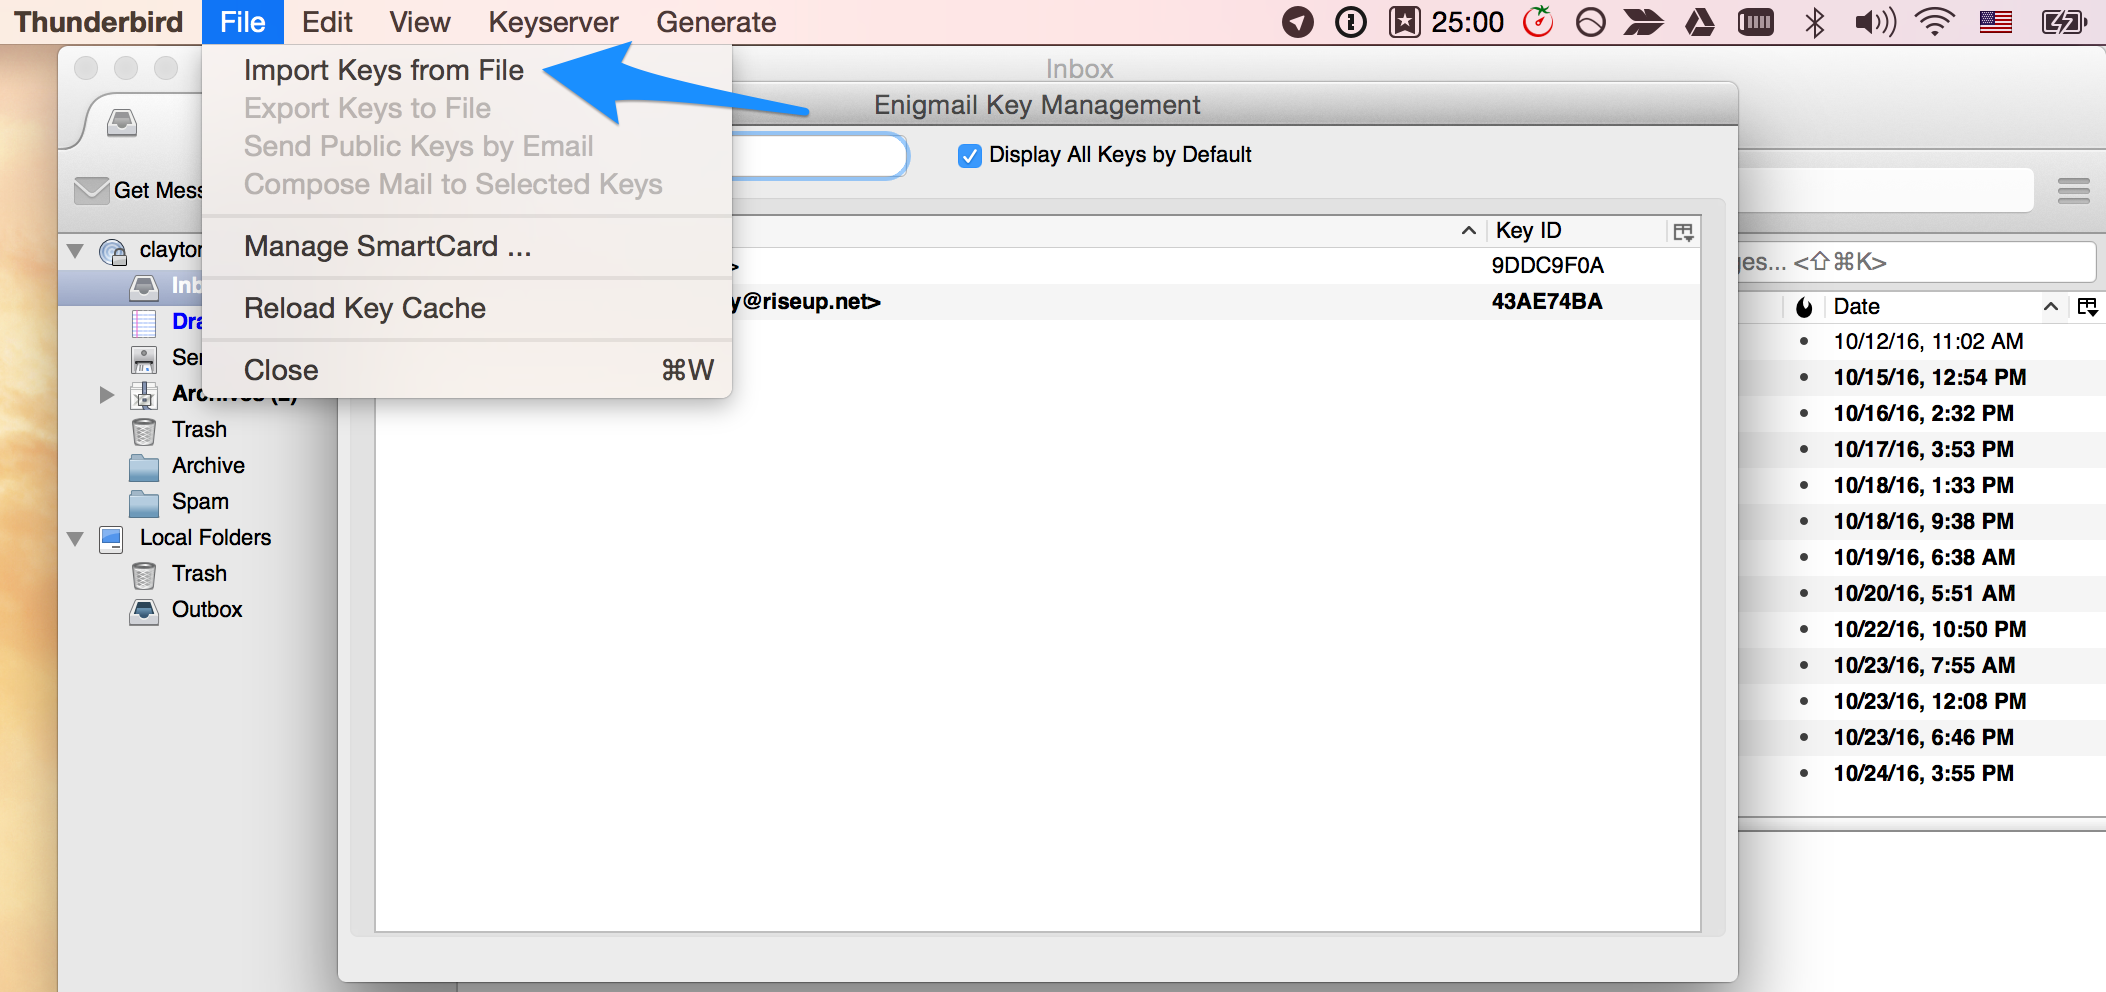
Then select your friend's key you downloaded.
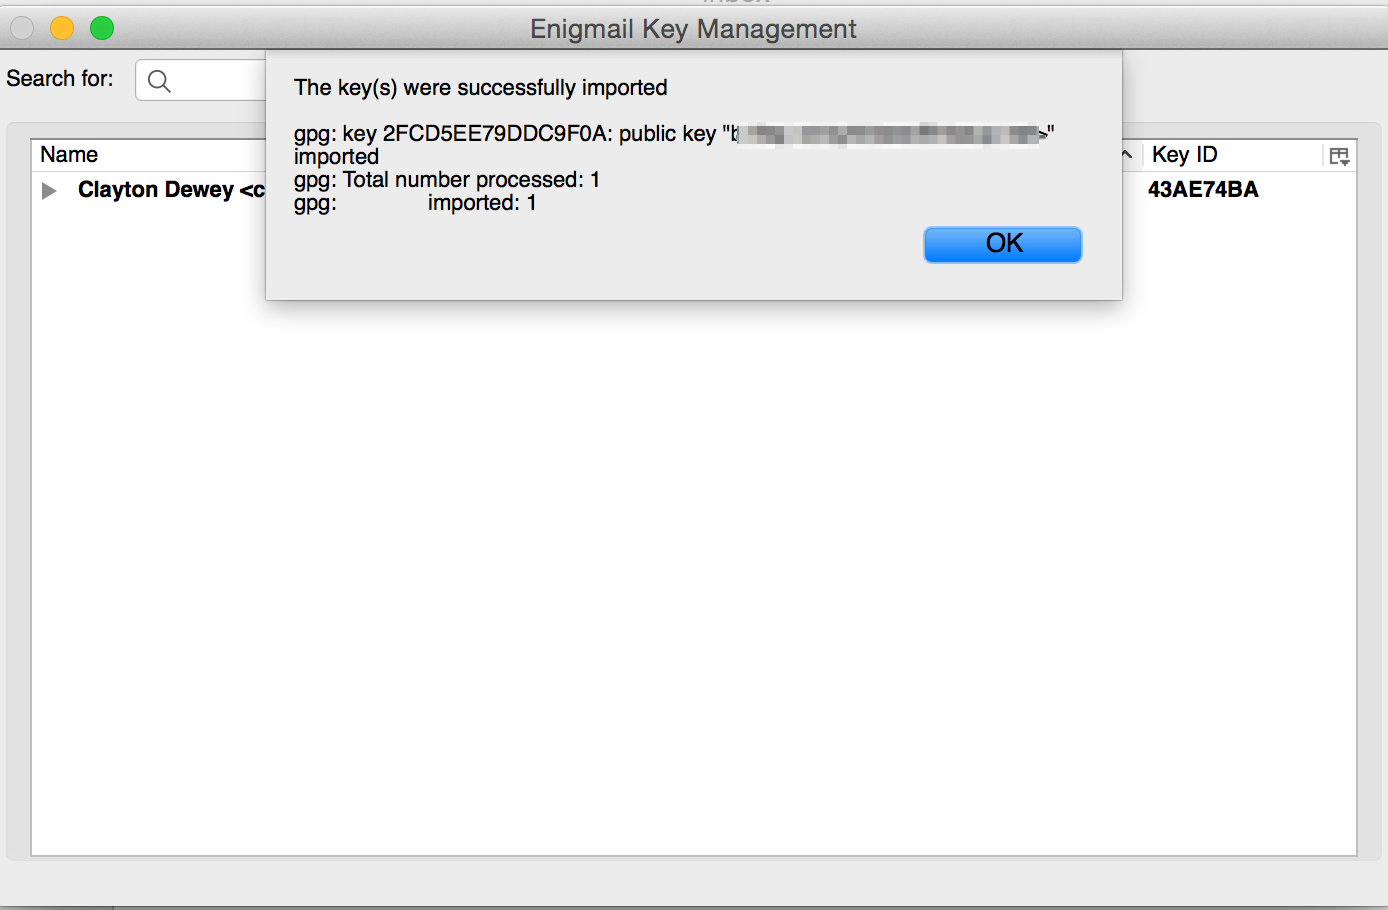
Ok. We're at the exciting part.
YOU CAN NOW SEND AN ENCRYPTED MESSAGE TO YOUR FRIEND.
yayayayayayayay
Compose a message.
Now click that lock icon.
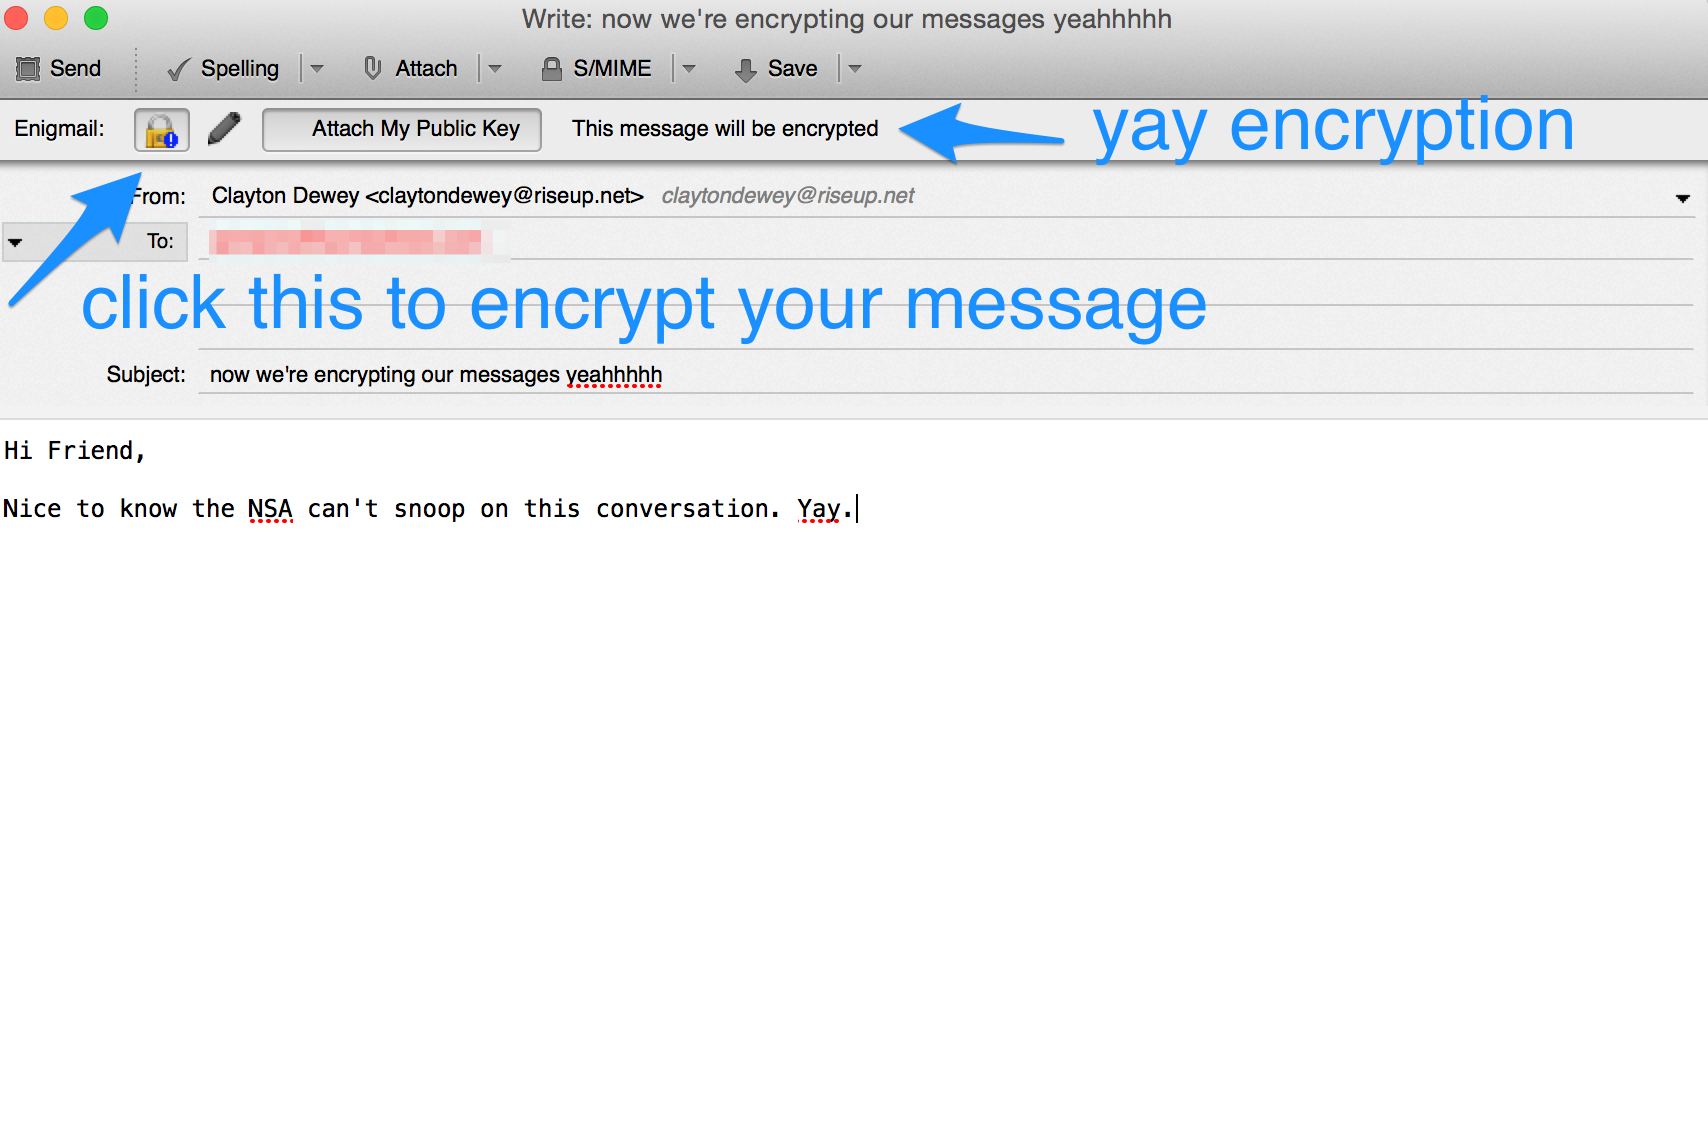
Boom. You are now harnessing the power of prime factorization, an encryption method that has never been cracked and joining the many others who believe when you communicate with someone, that's a conversation that should only be between you and that person. What a concept.